One Pan Herby Roast Chicken Dinner

Deliciously homey, there is nothing quite like a roast chicken surrounded by comforting veggies to make your home smell intoxicating.
As I sit at my kitchen table typing this entry, the radio humming (sometimes wailing) in the background, the dishwasher emitting its swirling noises, and the roses perfuming the air, one of my two cats hops up onto the chair at the head of the table looking at me expectantly. In the mysterious way of cats, she gives no indication as to what the actual intentions are, but I have a feeling she perhaps may be licking her chops in anticipation of the smells of a roasting chicken that is soon to come. You can not fault her, as the smell of a roasting chicken is arguably one of the best, most homey, and most delicious smells that can waft through any kitchen. I’ve even read that the esteemed Barefoot Contessa herself prefers a roast chicken over fried.
There have been quite a few roast chickens to come through my kitchen, such as this Lemon Ginger Chicken, or this Thai Red Curry Roasted Chicken, this Drunken Cilantro Lime Roast Chicken, and I’ve played with the ever amusing and delicious beer can chicken method, in addition to some BBQ roast chickens. The method I have found that produces the best, juiciest chickens is by using the Spatchcock method, otherwise known as butterflying the chicken by removing the backbone. By using this method, you are creating an even roasting field for the chicken to cook both the breast meat and the thigh meat at the same time without anything drying out.

Surround the chicken with the vegetables you choose to use, but make sure none are trapped under the chicken and that they are in contact with the bottom of the pan as much as possible.
This One Pan Herby Roast Chicken Dinner came about because I really wanted to have an impressively delicious, one pan dinner that I didn’t have to use any additional burners to create sides for. Basically, I wanted to be slightly lazy yet have something in my back pocket for a company dinner to allow more time for socializing and less time hovering over other dishes. There are multiple little steps you use to create different layers of flavor, from dry brining the chicken overnight to creating a compound herbed butter to slather over the chicken before it cooks. The vegetables you use are only seasoned with salt and pepper, the rest of the flavor comes from the pan drippings from the chicken, which I must say, are insanely delicious.
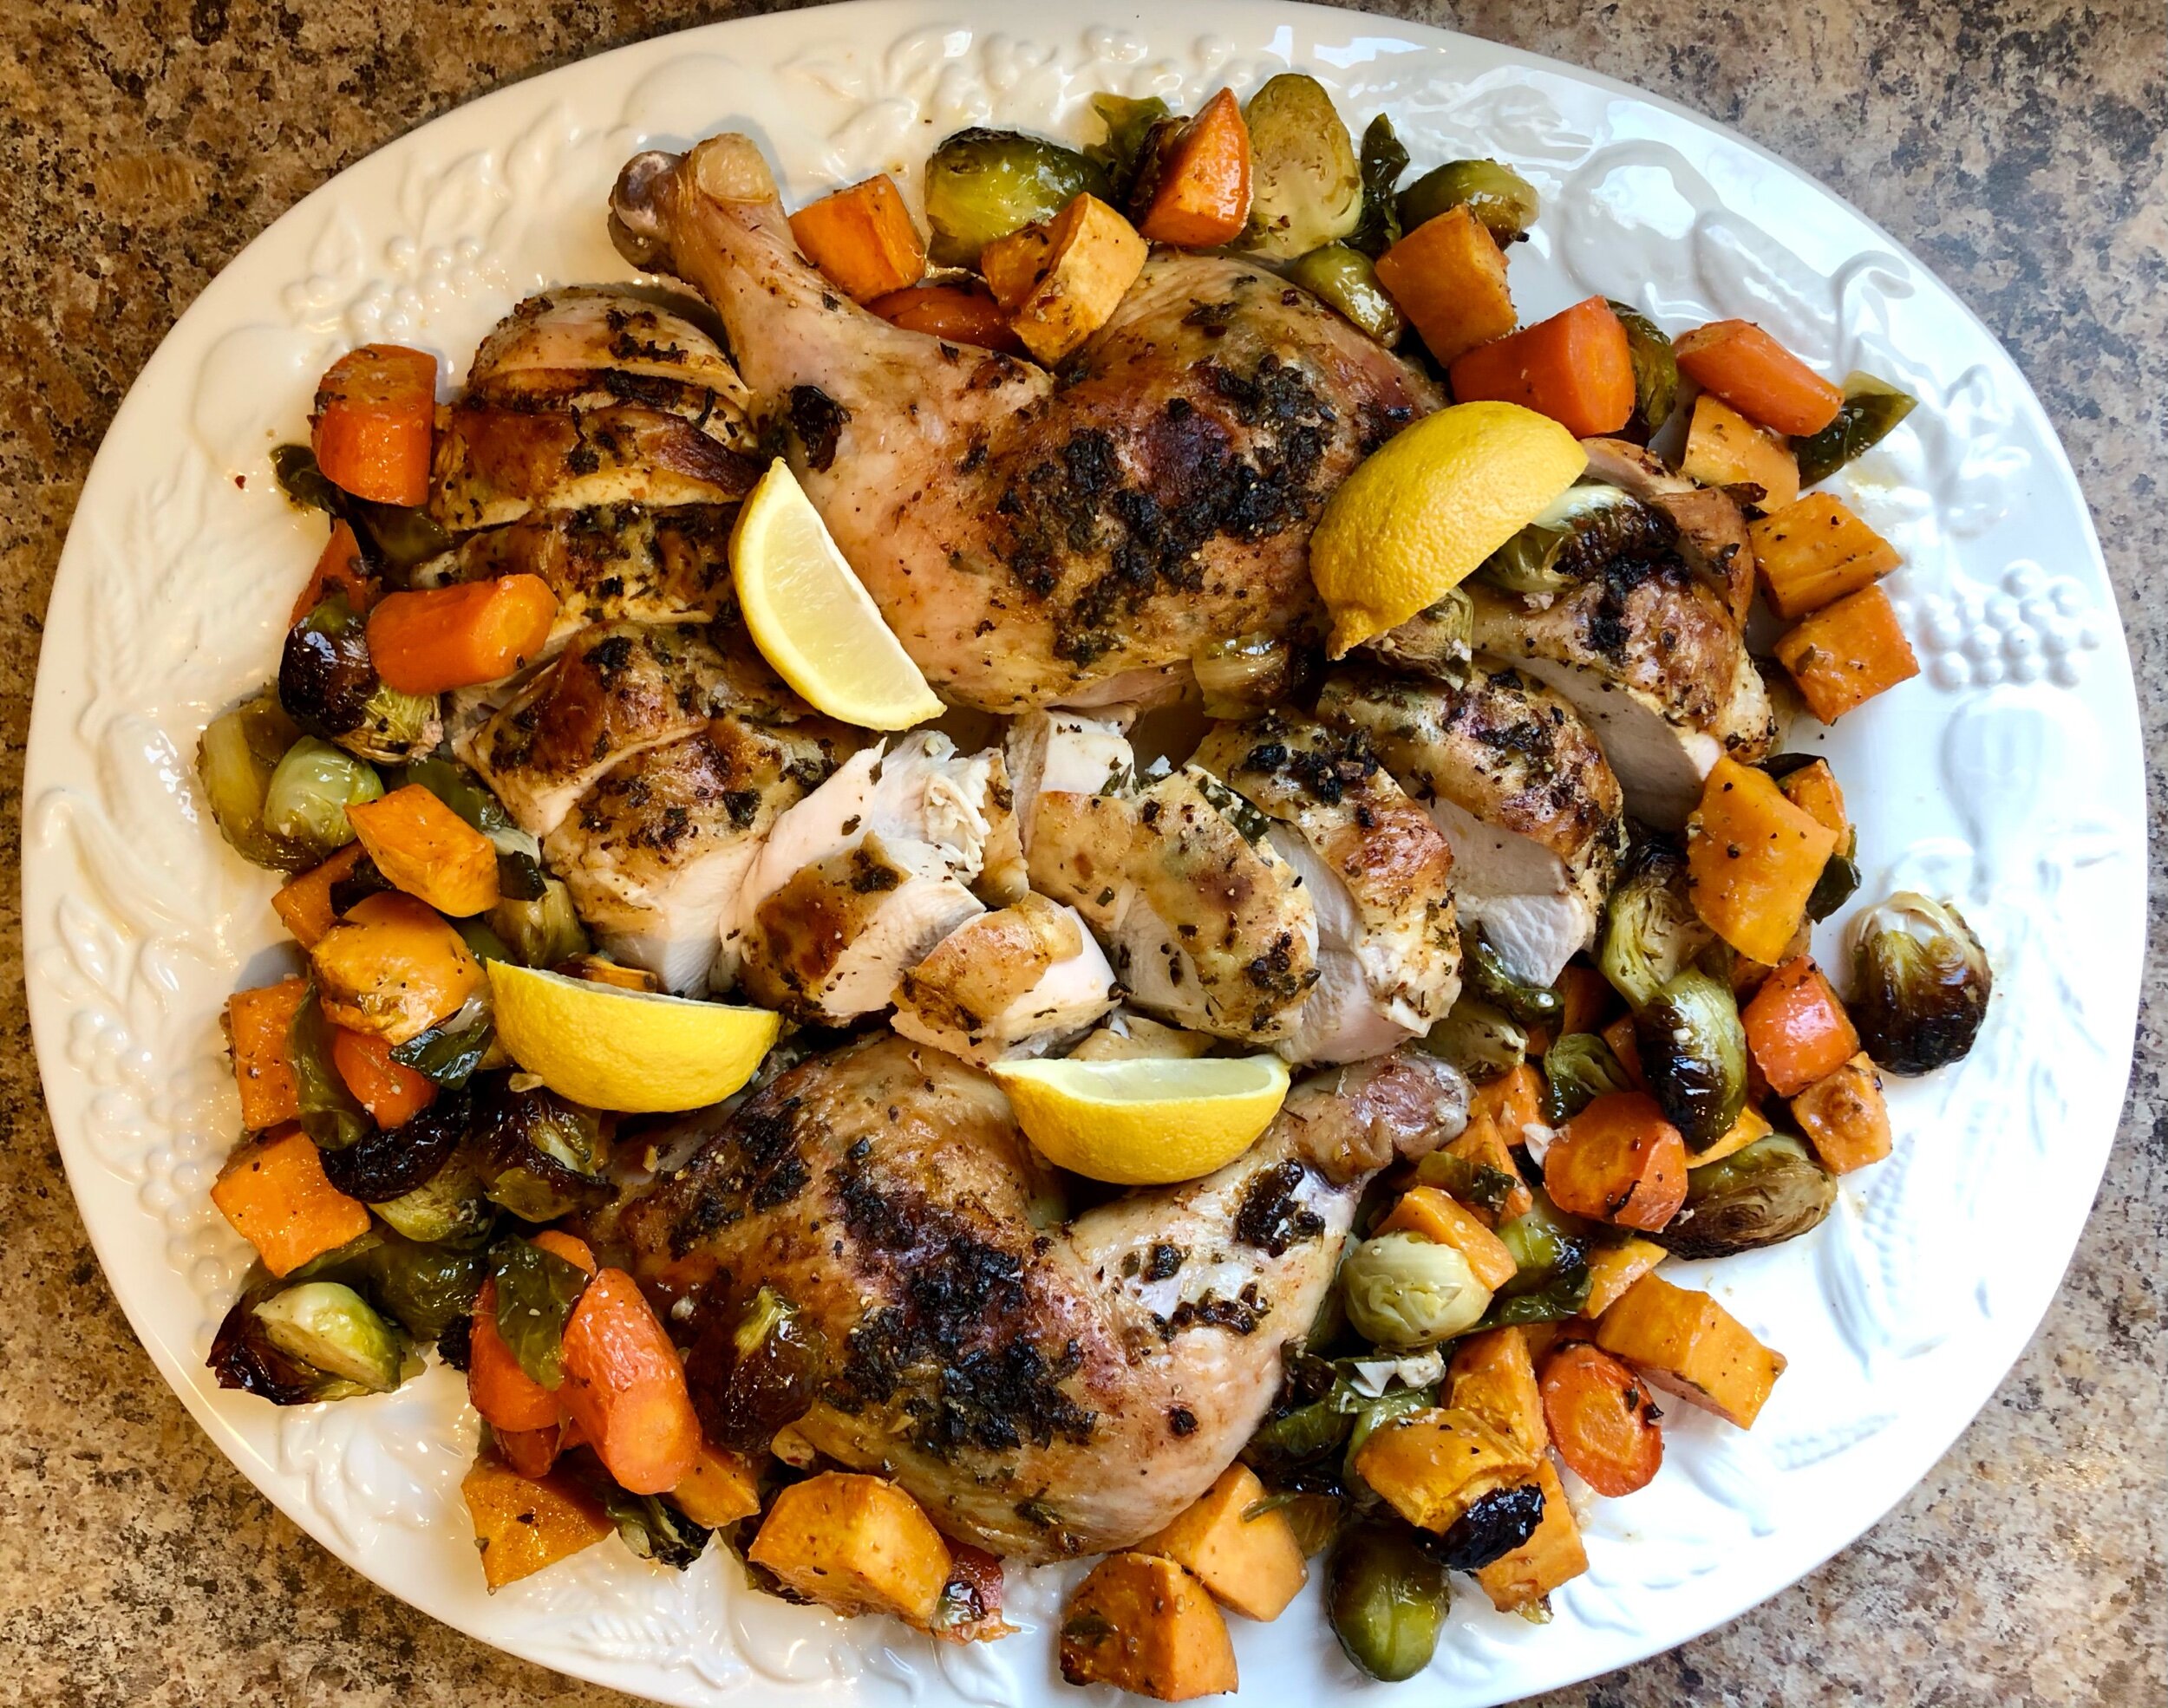
The flavor of the herbs in the dry brine permeates through the meat once it is cooked, subtle hints of thyme and sage. The chicken is super juicy, and the lemon in the herby butter helps brighten up all the rich flavors. The Brussel sprouts are meltingly tender in the center, but crisp on the edges. The sweet potatoes are like little cubes of creamy, dreamy sunshine. And not to be forgotten, the carrots do not overcook so they have a lovely little snap to them as you sink your teeth into them. I love to add a squeeze of fresh lemon juice over the chicken as an extra element of acid to brighten it up.

straight out of the oven, this One Pan Herby Roast Chicken Dinner will knock your socks off.
I broke down the recipe into sections to help you prepare this One Pan Herby Roast Chicken Dinner in the most efficient manner. Basically, if you get busy, you can walk away from it and come back if needed, to another section later - except for preparing the dry brine and chicken part, everything else is pretty flexible. It is 100% worth making this dish as it not only is really delicious, but is an incredibly comforting, delicious meal that dresses to impress if you need it to.

One Pan Herby Roast Chicken Dinner
Author: Iris Anna Gohn
Servings: 4-6 (depending on adults/children ratio
This One Pan Herby Roast Chicken Dinner is one of those meals that requires a little prep, but on the day you throw it in the oven, it’s almost obnoxiously easy. The dry brine is something that really flavors the meat of the chicken, helps draw out moisture in the skin so that it crisps beautifully in the oven, and the pan drippings from the chicken help finish flavoring the vegetables you use. I use two different types of salt in this as I like the different flavors and textures they lend to the finished dish - the kosher salt is less salty than the sea salt which helps the flavoring process, and the sea salt lends a lovely little mineral note.
I developed this to be an overnight process because there is a lot of chopping of vegetables and the breaking down of the chicken in addition to the actual cook time. You can absolutely do this in one day - prep everything in the morning by making the dry brine and breaking down the chicken first, letting that rest in the fridge for 8 hours or so, and making the herbed butter sometime during the day as well as chopping all the vegetables to be ready to go. I have absolutely done this and while yes, it makes for a delicious chicken dinner, the chicken really does benefit from the extra time in the fridge with the dry brine in my opinion. Prepping almost everything (the veggies cut and put in a big ziplock baggie, the herbed butter resting overnight on the counter, the chicken happily dry brining in the fridge) really allows this dinner to shine as a company dinner as all you have to do the next day is season the veggies, arrange them around the chicken on the pan, and make sure the chicken is well buttered before popping it in to the oven.
I recommend prepping this chicken at least 8 hours ahead of time, but no longer than 24 before roasting as the amount of salt will actually start oversalting the meat beyond 24 hours. You will achieve the best crispy skin if you go for the full 24 hours but I totally understand time crunches and doing it all in one day.
I’ve use both regular baby red or yellow potatoes with this dish, but my favorite is to use sweet potatoes. I like to peel them, then cut them into chunky 1 1/2 inch pieces.
If you don’t have a thermometer to temp the chicken, you can tell it is done when the juices run clear and the leg/thigh tugs easily away from the body of the chicken.
Lastly, I really love extra roasty, melty sweet potatoes, so if when you pull the chicken out the potatoes aren’t quite done to your softness liking, you can transfer the chicken onto a cutting board to rest, covered with aluminum foil, and pop the vegetables back in the oven for another 10-15 minutes.
Ingredients
For the Dry Brine/Chicken:
4-6 Pound Chicken, backbone removed (Spatchcocked, or butterflied), and patted dry with paper towels.
1 Tbsp Kosher Salt (I use coarse Morton’s Kosher Salt)
1/2 Tsp Sweet Paprika
1/2 Tsp Dried Sage
1/2 Tsp Dried Thyme
1/4 Tsp Red Pepper Flakes
1/4 Tsp Smoked Paprika
1/4 Tsp Fresh Cracked Pepper
For the Herbed Butter:
3 Tbsp softened Butter
1 Tbsp Extra Virgin Olive Oil
1 Tbsp Minced Garlic (3-5 cloves)
2 Tbsp chopped Parsley
1 Tsp Fresh Thyme
1/2 Tsp Lemon Zest (zest of 1 lemon)
2 Tbsp Lemon Juice (juice of 1 lemon)
1 Tsp Sea Salt (you can use just 1/2 Tsp if you are watching your sodium)
1/4 Tsp Fresh Cracked Pepper
For the Vegetables:
2 large Sweet Potatoes, diced into 1 1/2 inch cubes (Alternatively, 1 pound Baby Red Potatoes OR Baby Yellow Potatoes. No need to cut them in half unless unnaturally large for baby potatoes)
3 Carrots, diced into 1 inch cubes
1 pound Brussel Sprouts, ends trimmed and halved
2 Tbsp Olive Oil
1 Tsp Kosher Salt
1/4 Tsp Red Pepper Flakes (or, just a pinch if you are heat sensitive)
1/4 Tsp Fresh Cracked Black Pepper
Directions
For the Dry Brine/Chicken:
In a small bowl, combine the KOSHER SALT, sweet paprika, sage, thyme, red pepper flakes, smoked paprika, and fresh cracked pepper. Make sure the seasonings are thoroughly incorporated throughout the salt. Set aside.
Line a large sheet pan with HEAVY DUTY aluminum foil. Set aside.
Take your chicken out, remove innards, and pat completely dry with paper towels. Flip the chicken so it is breast side down, and remove the backbone with extremely sharp kitchen scissors. The backbone will be down the center of the upside down bird, and you are cutting along either side of the little tail stub. It will be relatively easy, just make sure you use enough force to cut through the cartilage and tendons. Dispose of the backbone.
Flip the chicken back over so the breast side is facing up, and spread out the legs so the entire bird lays flat. To ensure the chicken is laying flat put a good deal of pressure on the center of the bird where the two breasts meet and crack the breastbone so it lays completely flat. Take your hands and gently lift the skin away from the breasts/thighs so you can pocket seasonings and spices next to the meat as well as on the skin. If you make a little tear, don’t fret, just gently position it to where it is supposed to lay and it’ll roast up fine.
Place chicken breast side down on the aluminum foil. Season the underside of the chicken with maybe 1/5 of the dry brine, rubbing it into the meat thoroughly.
Flip the bird over and use about 1/2 the remaining dry brine to season the meat directly on the breasts and thighs, underneath the skin. Rub the seasonings in well. Then, with the remaining dry brine, season the skin of the chicken, rubbing it into the skin thoroughly. Tuck the wings under once they’re seasoned.
Cover and refrigerate for 8 to 24 hours. This allows the seasonings to penetrate the meat and draw out additional moisture in the skin to allow it to crisp up well when it roasts.
For the Herbed Butter:
In a small bowl, combine the softened butter, olive oil, garlic, parsley, thyme, lemon zest and juice, SEA SALT, and fresh cracked pepper. I use a spatula to really incorporate the solids into the butter, and don’t be alarmed if the lemon juice doesn’t fully incorporate into the butter. This is fine. Set aside until ready for use.
For the Vegetables:
In a large bowl, combine the sweet potatoes, carrots, and Brussel sprouts.
Drizzle in the olive oil, then add the salt, red pepper flakes, and the fresh cracked pepper. Stir to combine, making sure the olive oil and seasonings are coating each vegetable well.
To Assemble and Roast:
Preheat oven to 425 F. Take chicken out of fridge to let rest on the counter while the oven is preheating. During this time, you can prepare both the herbed butter and the vegetables (if you haven’t already) while the chicken is losing some of the chill from the fridge - this allows the chicken to roast more evenly in the end. It should rest about a half hour unrefrigerated before going into the oven, which also allows the oven to really get nice and hot.
Take the herbed butter and (get ready to get a little messy) use your hands to smear 1/5 of it on the underside of the chicken, flip it again to it’s breast side up, then smear 1/2 of the remaining butter under the skin on the breast and thigh meat, and the last bit on top of the skin as evenly as you can. Add a bit of additional fresh cracked pepper on top.
Take the prepared veggies and nestle them around the chicken. Try to make sure they don’t pile too high and have contact with the bottom of the roasting pan, as this helps them roast evenly.
Place in oven with the thighs facing the back of the oven and roast for 45-50 minutes, carefully tossing the vegetables halfway to ensure they roast evenly. I would start checking the chicken around 40 minutes for doneness if you have a smaller bird. The one used in these photos was just over 6 pounds and took closer to the 50 minutes to hit 155/160 F degrees. You can pull it out at this point as you’re going to have a bit of carryover cooking once you take it out.
Remove the chicken from the oven, cover with aluminum foil for a minimum of 10 minutes. This will allow the chicken to finish cooking so it internally temps to 165 F and allows the juices to redistribute through the meat. Trust me, DO NOT SKIP THIS STEP. It makes ALL the difference when you finally cut into the bird to serve it.