Honey Oat Bread


Oaty, velvety, and perfumed with a floral honey taste that complements the nuttiness of the oatmeal, this Honey Oat Bread is perfection for everyday sandwiches.
There are a multitude of aromas that one can associate with a feeling of serendipity, comfort, and nostalgia, all with one deep, grounded inhalation of whatever concoction you have simmering on the stove or in the oven. One of the loveliest, heart warming smells that consistently comes out of my kitchen is this yeasty, sweetly oaty, deliciously soft and crusty, Honey Oat Bread. It never fails to lure the cats to come down and weave their way onto the kitchen table chairs in hopes of being invited to partake in an evening meal containing this bread. Velvety soft inside, subtly sweet and floral while maintaining a delicate, savory oatmeal oomph, this bread slices perfectly for sandwiches or just a thick schmear of salty butter. The age old threat of “Prison food is just bread and water” no longer is a threat with these two little loaves that fill your home with the most delicious, make you weak-at-the-knees aromas.
Bread is one of those foods I had to learn to make from scratch after I found that highly processed, chemical-laden foods were not my friend in terms of how it made me feel after consuming them after my NMO diagnosis. I had perfected a Classic French Bread, Fluffed Up Kaiser Rolls, Soft Grinder Rolls and these Jalapeño Cheddar Burger Buns for fancy, restaurant style bookends for perfect sandwiches or burgers, but the hunt was on for a perfect sandwich bread. Something with a more defined texture, a hearty chew without being overly puffed up with air like store bought bread. Something akin to the bakery breads without crumbling to pieces as you slice them, and something that would toast unbelievably well.
This Honey Oat Bread is loosely based off of Fannie Farmer’s Oatmeal Bread, from her book The Fannie Farmer Cookbook. The original recipe calls for more honey, and I approach the preparation for the bake a bit differently than she does, but I’ve implemented enough tweaks and riffs on it that I feel like this little guy is now my own. I have baked this a multitude of times, and I wholly recommend using a stand mixer as the dough is more of a batter, very stiff and wet, as you work with it. I have also tried using different proportions of Wheat Flour and All Purpose Flour and Bread Flour, and I have found that regular old All Purpose Flour works best in terms of the rise and the texture of the finished bread.
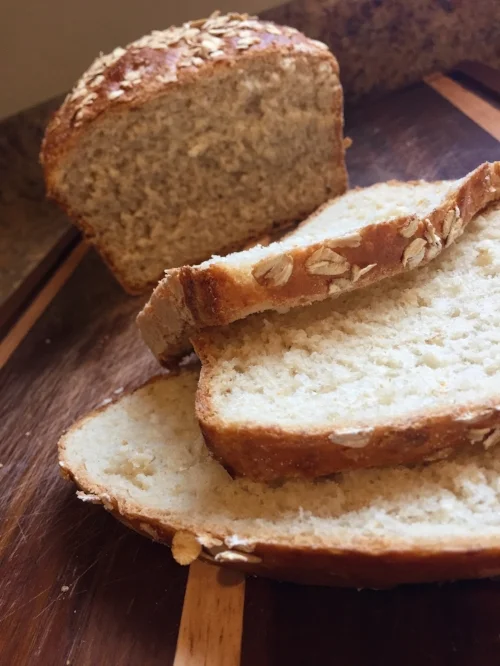
Slicing this bread once it is cooled ensures you will have an easy, non crumby, jagged piece of bread for your sandwich.
The dough is VERY stiff and wet after you add in the flour and are ready to divide it into two. I always sprinkle a bit of flour on top of the dough and use a spatula to help me scrape it onto a well floured surface, then lightly dust the two dough balls so they are not sticky before shaping into a rectangle to fold into the envelope loaf shape. Taking this extra step allows the structure of the bread to remain sturdier as it rises, helping it stand nice and tall. I have also found, through trial and error, that brushing the egg wash on with a pastry brush tends to be a better, safer bet than using your fingers before sprinkling on the oats before baking. Let’s just say I may have accidentally deflated a couple loaves by accident by not being quite gentle enough with my fingers.
When you get the bread in the oven to bake, within the first 15 minutes the house starts to smell like an old school, Parisian bakery where Baugettes are flying out the door every few minutes. The tops of the little loaves get golden brown and crusty, and the oats start smelling wonderfully toasty and slightly sweet and nutty. It feels like a punishment to wait for the loaves to cool completely before slicing into the cozy little bread, but waiting to do so ensures a much more even, non-crumby slice for sandwiches or toast. You can proceed, however, at your own risk and luxuriate in a slice of warm, velvety bread with cool, salted butter.
This is my perfect sandwich bread, and my go-to for everyday turkey sandwiches or peanut butter and jelly toast. I go on little spurts, especially during the hotter months, where all I want to eat is cold sandwiches or salads or fruit. The honey is subtly there, tickling your senses, but not in a way that makes you think this is an overly sweet bread, because the oats completely balance it out. The salt level is just right so all the individual flavors are enhanced, not overpowered, and this bread is phenomenal toasted or grilled. As it is with all home baked breads that contain no preservatives/chemicals, the shelf life is not terribly long, so toast, grilled cheeses, and panini press sandwiches are perfect on days 3, 4 and 5 of this bread for enhancing its natural life. If prison food is made up of bread and water, this is the bread that would be my pick for the same food day in and day out.

Perfect for everyday sandwiches, this bread also makes the BEST base for Grilled Cheese and French Toast. One of my favorite ways to eat it though, is as a simple Peanut Butter and Jelly Toast.
Honey Oat Bread
Author: Iris Anna Gohn
Servings: Two 9x5 Loaves
This Honey Oat Bread is amazing, and is worth the roughly 3 hour process. Much of the time is spent waiting for the bread to rise, and then to bake, so the active time is roughly 20 to 30 minutes in waiting for the yeast to bloom, getting the oatmeal portion ready, and shaping the bread. I’d recommend starting this bread in the morning, and getting some much needed housework done in the times while you wait for it to rise and bake. It is completely worth it, and you have the added bonus of a terrific smelling house and no chemicals in the finished product.
Once the bread is baked and cooled, if you know for sure you are not going to consume both loaves within a 5 day period, freeze one loaf in a freezer safe bread bag. It will keep for up to one month, and you just have to pull it out of the freezer and defrost before using.
This bread makes a great base for sandwiches, but I have also used it in French Toast, regular toast, fresh breadcrumbs, and stuffing. The texture is dense enough to be a good base for a bread pudding as well, if you do not want to use a super rich bread like Brioche. Again, I cannot stress enough that it is best to slice this bread once it has cooled, because otherwise the warm bread has a tendency to tear or be extra crumby/jagged edges, which makes for slightly misshapen sandwich.
Ingredients
- 2 Cups Warm Water, divided
- 2 Tbsp Active Dry Yeast
- 1 Cup Old Fashioned Oatmeal (uncooked, not instant oats) + more for sprinkling on the tops of the bread loaves
- 1/3 Cup (5 Tbsp) Salted Butter
- 1/4 Cup Honey
- 1 Tsp Sea Salt
- 1 Egg + 1 Egg White, divided
- 5 Cups All Purpose Flour
- 1 Tbsp Water
Directions
- Preheat the Oven to 375 F. Spray two 9x5 bread tins with cooking spray and lightly dust the tins with flour, taking sure that everything is coated. Set aside.
- In the bowl of a stand mixer fitted with the bread hook attachment, add 1 Cup warm water and mix with the yeast. (Water should be 110 degrees F, or what I do is have the tap water feel lightly warm on the back of my hand). Let sit for 7 to 10 minutes, until nice and foamy.
- In a medium saucepan over medium high heat, combine the remaining cup of water with the oatmeal and salt and bring to a boil. Cook for one minute, then reduce the heat to medium low and add in the butter and honey. The oatmeal should cook in 4 to 5 minutes, when done turn off heat and let the oatmeal cool until it does not have a lot of heat when you touch the tip of your finger to it. While the oatmeal is cooling you can measure out the flour and set aside, as well as whisk ONE egg in a separate bowl and set aside.
- Add to the activated yeast 2 Cups of flour as well as the whisked egg and cooled oatmeal. Mix on low speed (mixer speed 2) until mostly combined, and then slowly add the remaining 3 cups of flour a couple tablespoons at a time. Let the dough knead for about 10 minutes. It will be a very stiff dough, but the bottom of the dough will most likely still be slightly attached to the bottom of the bowl.
- Using a spatula and a light dusting of flour, turn the dough out oto a lightly floured work surface. Divide the dough in half. Shape one half into a long rectangle, and fold one end one third of the way into the middle and the opposite end over the top of the middle, like an envelope. Gently lay the shaped loaf into one of the prepared bread pans lengthwise, seam side down. Repeat with other half of dough.
- Cover each bread pan with damp paper towels and let the dough rise for 35 to 45 minutes on top of the heated oven. This creates a lovely warm environment for the bread to rise during this time.
- When the dough has doubled in size, whisk together the egg white and the last Tbsp of water. Gently brush onto the top of the loaves and sprinkle additional uncooked oats on top.
- Bake for 40 to 45 minutes. Bread will be done when you tap it and it sounds hollow. Cool in bread pans for 15 minutes, then gently remove and finish cooling on a wire rack. Let cool completely before slicing. Store in an airtight container for up to 4 to 5 days.